Now that you've read my Beginner's Guide and Intermediate Guide, I think it's time to get into the specifics of how to become an advanced Cepter in Culdcept Saga. These are some tricks of the trade that can take a while to grasp, but once you have them down, you should be prepared for just about anything. Some of the things we will be going over have been covered briefly in my previous guides. I will be going over these factors a bit more thoroughly here.
Some items to be covered here include: Deck Synergy, Diversion tactics, picking maps, tweaking decks, choosing the right target, anticipating counters and thinking outside the box. So, let's get started.
Note: I've gotten several requests to go over symbols more in-depth. I will not be doing that in this guide, I am compiling a completely separate guide dedicated to all things Symbols.
Deck Synergy.
Synergy is defined as the cooperation of two or more items. In the case of Culdcept, it's the cooperation of your cards working together in your deck. Getting your cards to flow together well is critical to a well performing deck. A significant factor in Culdcept is pulling the right card at the right time. Part of this is luck, the other part of this is a balanced deck. Having a flexible deck capable of meeting multiple challenges helps this as well.
I talked about not flooding a book with 4 of one type of card. This is Synergy. Sure, you could use that card 4 times to great effect, but if that's the only card coming up frequently and the one you want is buried under a bunch of useless cards, then you will be hurting for a while.
A few things to consider when building a deck that has synergy: Does this card belong? If you are running a red and green deck, chances are blue creatures won't play a large role in it. Especially, if that blue creature requires you to have blue land to play. Wasted cards that take up space would be things like Permission on a map with a completely linear path (Santana Village, Colosseum I/III) or Pressure on a map with no Temples. Having 4 of a card that recycles into your deck can bog down your draws. Chariot is a great card for using over and over, eventually, you will run out of a need to use it that turn, unfortunately, with 4 in a deck, you could find yourself drawing nothing but Chariot near your deck's recycle point.
Deck Lubrication.
This isn't some perverted digital card fetish thing I'm talking about. This is the process of adding cards that make your deck move faster. Wind of Hope (Draw 2 cards), Find, Reincarnation (Discard all cards and redraw), Brass Idol, Gift, Fate, Tombstone, Foresight, etc.
These spells and creatures can keep your hand filled with useful cards. If you're desperate for an item you know is coming up and a big toll is looming on the horizon, Wind of Hope or Foresight can help you dig just a little deeper to find what you need. Foresight is especially useful for this. Find is a great card overall, 20g to draw an extra card and Find stays in your hand?! Fantastic for burning through the useless cards for more profitable spells. Find works well with Goblin's Lair and Refuge. It refills your hand so you can sacrifice cards for money or goblins.
Brass Idol has multiple uses in this department. Some decks rely on a gradual draw. They stockpile items and spells in hand to be used when the time is right. Brass Idol forces them to prioritize what they keep in hand. "Do I discard the Counter Amulet or the Magma Avatar?! Choices, choices!!!" It can freak people out to the point where they discard something on accident and mess their entire strategy up. Be wary, this can happen to you as well.
Note: When using Reincarnation, it discards all cards in your hand and redraws that many again. If you happen to draw a second Reincarnation, you may as well discard it as it won't be serving any purpose once it's discarded by the other Reincarnation.
Diversion Tactics.
This is something every Cepter should master. If you're familiar with the old adage: "Never judge a book by its cover" then you should know that applies here as well. The color of your book cover can throw the opponent off. Having a blue cover makes people think you'll be running blue... maybe blue and yellow. So, they use a deck designed to counter that type of deck. When you start the game, that blue-covered book might turn out to hold green and red creatures.
Avatar parts can have this effect as well. If they see your avatar wearing Magma Armor, they'll think you really like Green and Red and are probably going to run it. Prove em wrong. One thing that veterans enjoy doing is dressing up as a "Starter" avatar. Basically, looking like you just got the game and haven't acquired any neat Avatar parts yet, so they assume the "Starter" avatar will have junk cards. This is harder to pull off once you've played a few of the regulars.
You can also make the bull see red, so to speak. Certain creatures are HATED online. Sea Bonze... Kelpie... Lead Idol... Marble Idol... etc. Kelpie is a great distraction to throw down while setting up things your deck is really going to utilize. Usually, Kelpie hits the board and the opponent starts soiling themselves attempting to cut Kelpie down before he becomes a big problem. While he's focusing his attention on the poor guy, you'll be pumping up some other creature like... Undine. Undine is a much better defender than Kelpie, it's just that people assume Undine is less significant because he doesn't stop you on blue automatically. Other distractions are setting down creatures capable of taking out their big territories in positions that can easily be a reality. Setting Tengu down when there's a big yellow land ready for the taking, your opponent will want to remove Tengu as soon as possible. Setting Kelpie or some other distraction down right after Tengu will make your opponent stress out trying to figure out which creature to target.
Right Deck for the Right Map.
This one should be pretty self-explanatory. Don't bring a deck that requires the use of symbols to a map with no Temple. Don't bring a deck that uses a lot of Goblin's Lair to a smaller map. It may not be a good idea to bring a yellow book to a map that is primarily green colored. The point is, certain types of decks perform better on different maps. That's not to say certain ones won't perform well on all maps, it's just that some maps are perfect for some decks.
On that note, any deck can be made to perform moderately better by swapping in and out cards depending on the map. If the map in question has multiple paths around the castle and 4 forts, you may want to swap in a few permissions for shorter laps and quicker bonuses. If a map has a temple on it, you may want to swap in a Corruption or two to smack your opponent if they decide they want to buy up a bunch of symbols. If you are playing on a smaller map, you may want to consider throwing Lead Idol in there to keep your opponent from walking over and taking out your territories.
Figure Out How to Defeat Yourself.
When creating a deck, it's a good idea to think of how you can beat your own deck if you were playing against it. Once you have figured out how best to defeat your deck, factor in some cards that will prevent that from happening.
Say you're running an Idol deck. What really hurts neutral, defensive 0/20 creatures? Armored Dragon. Okay, I could add in a trade to prevent him from zapping my boys. Well, how about adding Ebony Idol and prevent him from zapping neutral creatures in the first place. Okay, Armored Dragon neutralized. Acid Rain! Okay, let's add some Mass Phantasm so Acid Rain and Unholy Blight can't get my Idols. Sculpture could make them all statues... not a whole lot you can do to fight that. Pack a few extra idols maybe. Throw in a Fat Body or two, perhaps. Those are just a few answers to some spell cards. Throw in some Gaseous Forms to protect them. Have a set of single creatures so that they don't become multiples should Marble be in play (if you're using Marble). Those are all things to consider.
Target the Right Person.
Instinct says, in a free-for-all match, you should Drain Magic the guy with the most pocket change. This isn't always the case. Say you are playing a three-way with two other opponents. Opponent 1 has 100g, just enough to use the one defensive item in his hand, a Counter Amulet. He has a very large land that you could take if only he didn't have that pesky Counter Amulet in hand.
Opponent 2 has 1400g in his pocket. He has 1 land to his name that is defended by... a paralyzed idol 0/20.
Opponent 1 has several big lands, and he's straight-up dominating this match. You could win if you take one of his big lands and cross the castle. Do you Drain Magic the guy with 1400g and get... 400g as a result. Or do you drain magic the guy with 100g... reduce him to 70g... make him unable to use Counter Amulet, waltz over to his big land and take it while he's out of cash. Sometimes the obvious choice isn't always the best.
Think Outside the Box.
Chances are, if you're reading this, you've become fairly familiar with all the cards. I'm certain there are some cards you are looking at going... why is this card in the game?! When given this question... take the time to consider why each card is in the game. They all have a purpose. That purpose might not be immediately evident... but some of the most ridiculous abilities are some of the most powerful. Take Sea Bonze for example. Rare Blue card... 20/40 Defensive creature whose innate ability is "During battle no abilities can be used."
So that translates to... No items, both defensive and offensive can be used. All creatures are reduced to their base stats. What the heck is up with that?! So I can't use Gaseous Form... Counter Amulet... anything! That sucks! Or does it? Think about it. 20/40 creature on an off-color land... it'd take a creature with a minimum of 40ST to kill it... easily done. Let's put that 20/40 on a blue land... So he's a 20/40 with land bonus. Level the land to three and that land bonus becomes 30, putting his life effectively at 70HP. The only creatures capable of pulling this off are Death Scythe (70/10) and Colossus (70/70). Perhaps an adjacent creature can provide and extra 10ST, but still... difficult to overcome. Throw a Mutation on there or Fat Body. That's now a 20/60 with 30 land bonus. Effectively a 20/90 and no items can be used against it. It also doesn't get poisoned by Mutation because enchantments don't factor in either. Good luck dethroning that beast.
How about Giant Fossil? 0/50 Neutral defensive creature that doesn't collect tolls but if you kill it... it turns into a T-Rex and collects a toll. Why bother with this guy? He's a great land holder. Your opponent can land on it, they don't have to pay a toll. Why bother invading it? Even if I kill it, I still have to pay the toll. It's a nice 4th level land providing you with 400g per Fame. Giant Fossil turns into a great land to sweep up with Tokebi. Who cares if he goes away? He was just holding a land for you until you swept him up for more cash. How about Relief? Giant Fossil is holding a big blue land that nobody cares about... until you Relief him with a Kelpie. Now you can spend some time safely leveling up another land until you swap a more viable toll collector onto it.
The point is, every card has its use. Take the time to give every card the benefit of the doubt and think outside the box. Many innovative decks have arisen from an apparently useless card. Conversely, every card has a counter no matter how invincible it may seem. The mighty Magma Avatar that turns into 120/120 beast of doom when attacking still has only 30HP. It still gets turned into a statue by Sculpture. It still goes poof when hit by Lightning/Hardrock Dragon or Frost Needle. The mighty Red Cap that turns into a 200/200 piece of Goblin doom goes poof if Banishing Ray hits him. Nothing is safe.
I hope this guide has helped you with some of the tips and tricks to evolve into an expert in Culdcept Saga. There is still more to this game than I've seen and I've been playing it for over a year now. Feel free to let me know what you think. Any further questions or advice you'd like, I'm happy to provide.
Good Luck and enjoy.
Last Updated on Saturday, 08 June 2013 11:34
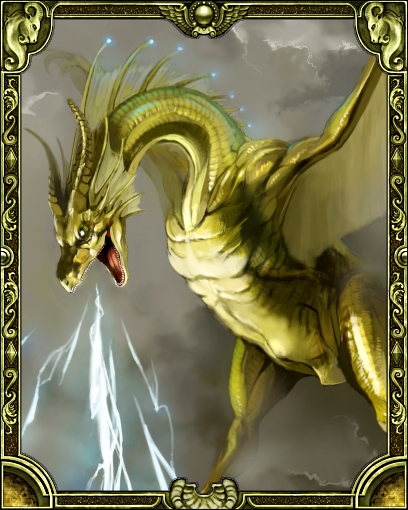
Card of the Moment
Lightning Dragon 360 ST:60 HP:50 MHP:50 G:140+ Land Limit: Item Limit: Attacks First / Neutralizes: / Territory (80G): Deals 30 damage to target or creature.
Culdcept Saga
Login
Featured On...
Poll of the Moment
What are you doing until the next Culdcept?
Votes: (0%)
Votes: (0%)
Votes: (0%)
Votes: (0%)
Votes: (0%)
Votes: (0%)
Total Votes:
First Vote:
Last Vote:
Follow Us!
Please help support our site costs by donating via the PayPal button above. Thanks in advance!